How to onboard yourself with IdNow
Step 1
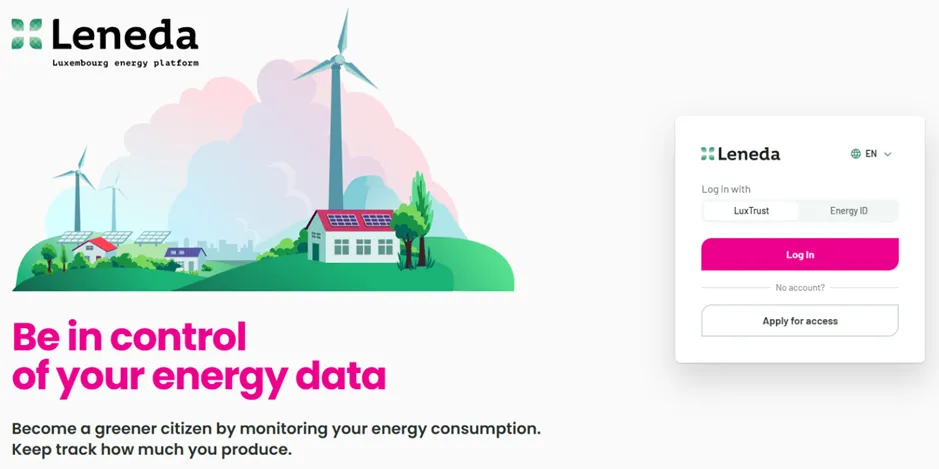
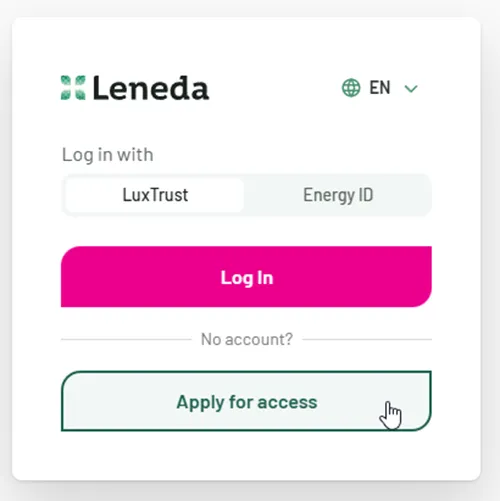
Open the web page “app.leneda.eu” in your browser. You will see the log-in screen with different options.
Step 2
At the bottom you will see “Apply for access” for new users. Click on this option to start your onboarding.
Step 3
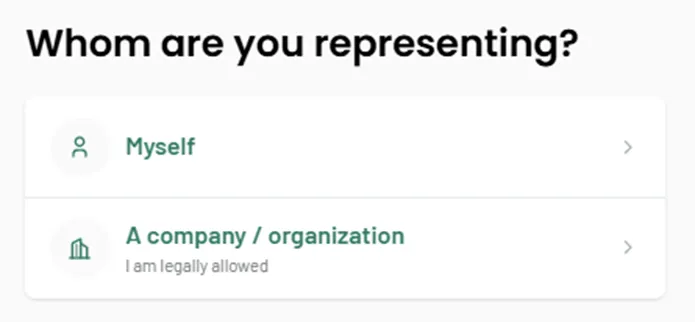
In this step, you need to choose whether you want to onboard yourself or if you want to register a company to Leneda. Choose “Myself” if you want to access Leneda in your private context. If you want to access Leneda in a professional context (company, organization, administration or ownership association) then choose “A company” to register your company.
Note that you need to register yourself first before being able to onboard the company. The related procedure to onboard a company can be found here here.
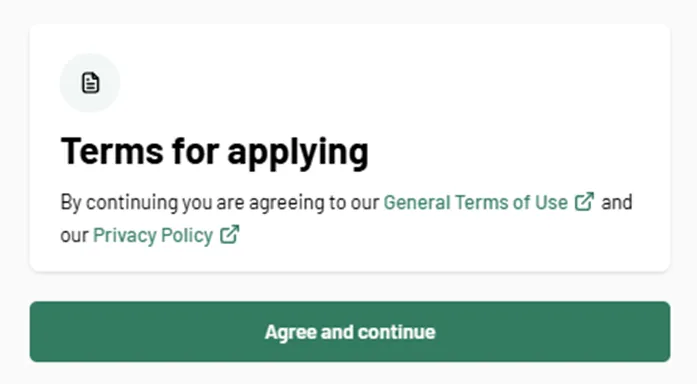
Step 4
Before continuing with the onboarding process, you must read our “General Terms of Use” and our “Privacy Policy”. To proceed, confirm your agreement by clicking on “Agree and continue”.
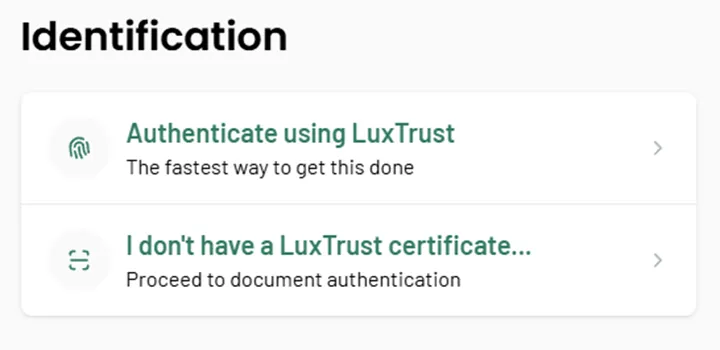
Step 5
Choose the option: “I don’t have a LuxTrust certificate”.
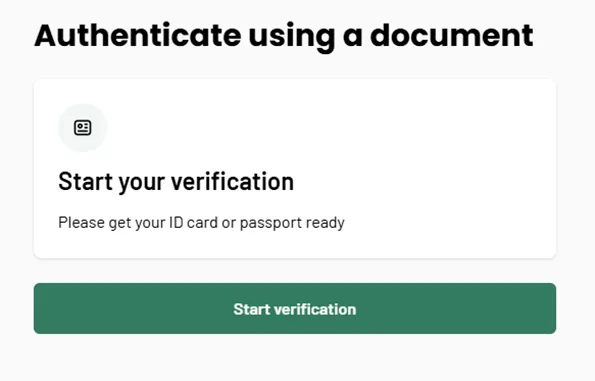
Step 6
You need to start an online verification process with your ID card.
Click on “Start verification”.
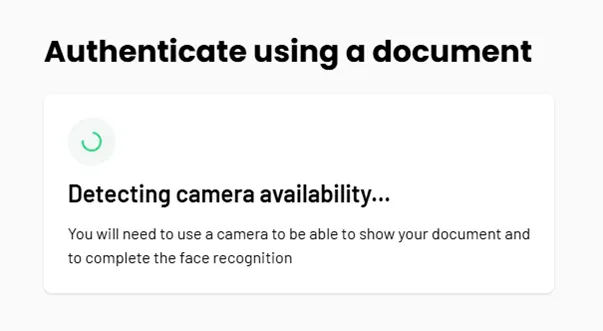
This page is displayed during the check to see if your current device has a camera. A good camera is needed for the next steps.
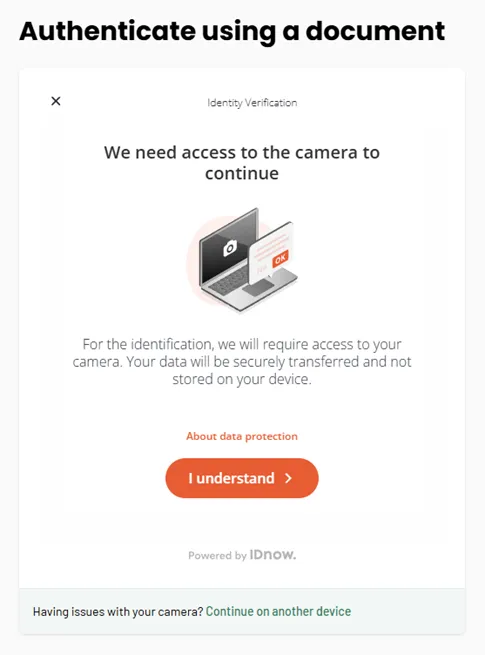
Step 7
In this step you find the Data protection policies by IDnow. Before continuing, please click on “I understand”.
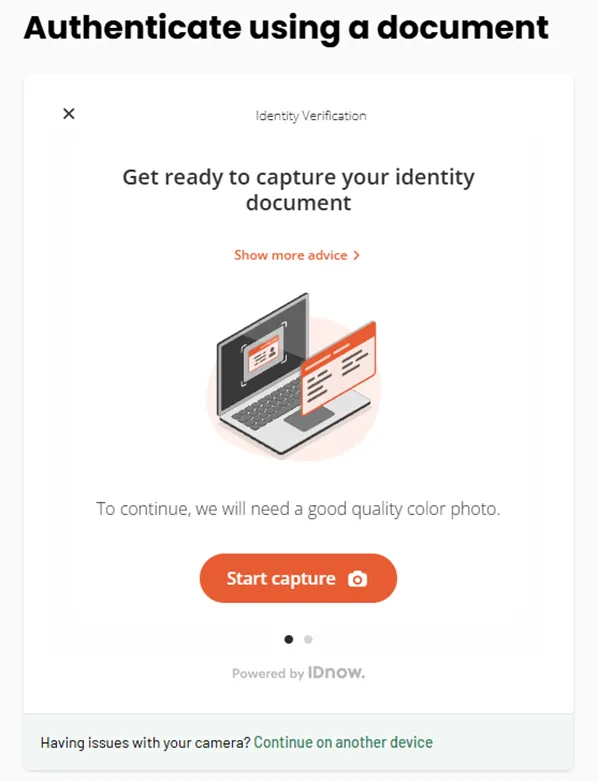
Step 8
If your device has a camera, you can start the identity verification process on this device by clicking on “Start capture”.
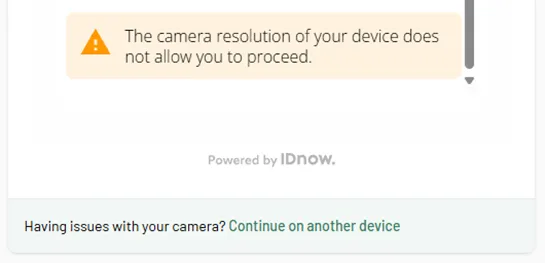
If the camera quality is not good enough, you must switch to another device by choosing “Continue on another device”. It is recommended to use a mobile phone or tablet and not the camera on the laptop or any webcam.
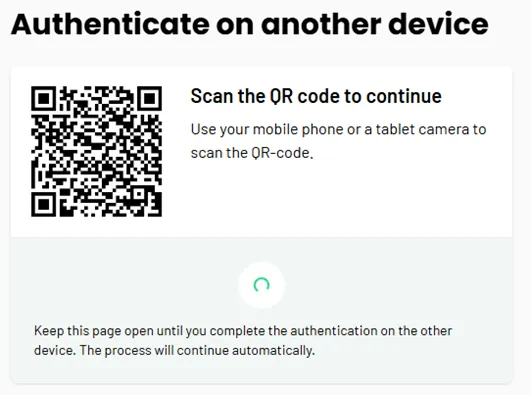
When you continue the identity verification process on another device or your current device doesn’t have a camera, this window is shown. Scan the QR code using another device and keep the page open.
Step 9
Now follow the authentication process step by step as shown on your screen.
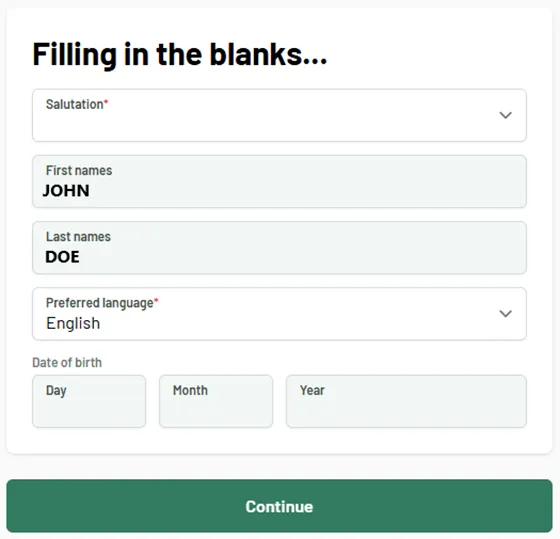
Step 10
The process takes you to the next screen, in which your first and last names are already filled out. We just need a couple of more information from you to wrap things up.
- Salutation (how should we address you?)
- Preferred language (which language do you want the Leneda to communicate with you?)
- Date of birth (We check this information against LuxTrust to make sure we have the correct data. Moreover, if you ever lose your access to Leneda, we can use this to verify that it is you)
After filling out further information about yourself, please click “Continue”.
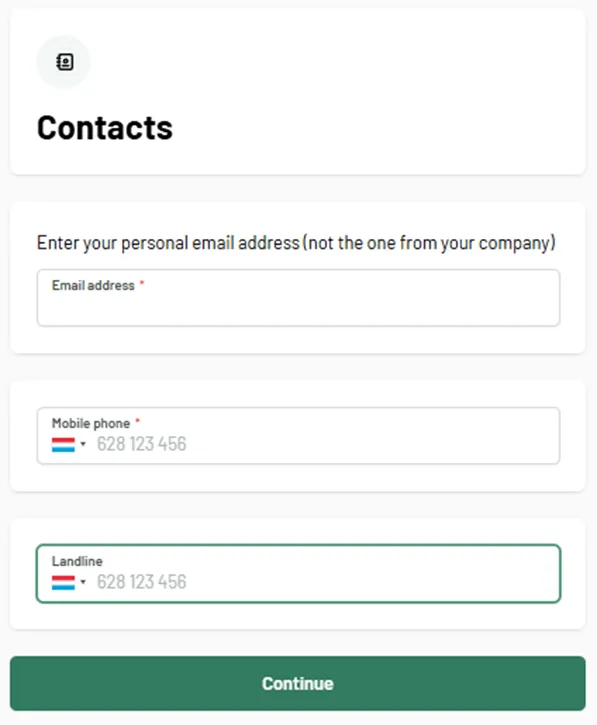
Step 11
Now we need to define how we can communicate with you. We will ask to provide your email address and a phone number, which you will then need to verify.
Please note: An email address and either a mobile phone number or a landline number are mandatory.
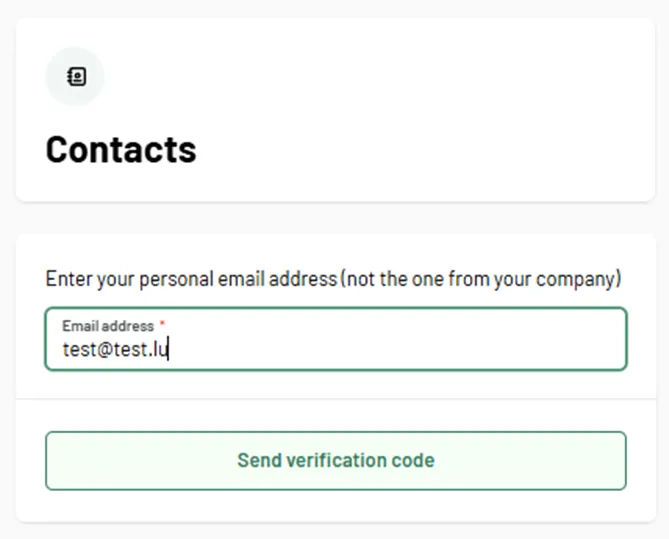
Step 12
After entering your email address, the “Send verification code” button will appear.
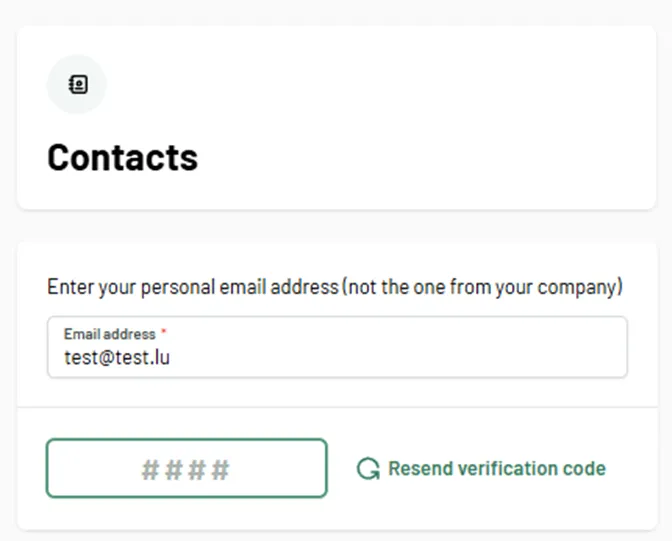
Click on it and enter the verification code that was sent to your email inbox.
If you notice a typo in the provided email address or accidentally entered the wrong one, you can correct it and request a new verification code.
Later, you can also change your email address in the system if needed.
Step 13
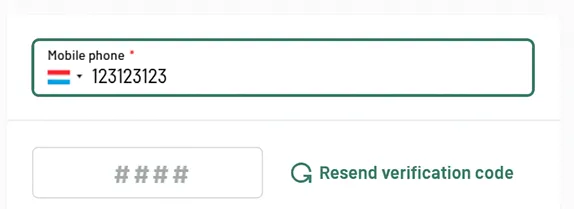
After verifying your email address, we will ask for a phone number. First, select the country of your mobile or landline provider.
Then enter your phone number without the country code. You can provide either a mobile number or a landline number.
If you choose a mobile number, click “Send verification code” to receive a unique code via SMS.
Enter the code you received in the verification field.
If you notice a typo or entered the wrong number, you can correct it and request a new code.
Once the correct code has been successfully verified, you may add an additional landline number or simply click “Continue” to move on to the next step.

Step 14
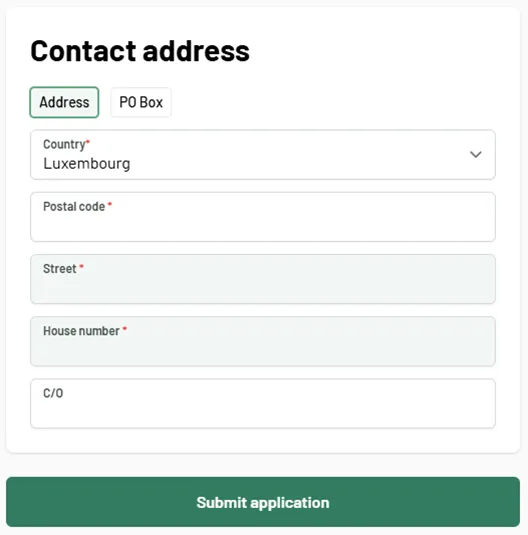
In the final step of your registration, we ask you to provide a contact address.
You can choose between a normal address or a PO Box address.
All of the fields that include a red mark are mandatory fields.
When you are done with the entry of your address, you can click on “Submit application”.
Step 15
In this step, you need to create a strong password. Make sure it meets the following criteria:
- At least 14 characters long
- Does not contain common phrases or easily guessable patterns

Step 16
As the final step, you need to define your preferred multi-factor authentication method.
You can choose to receive verification codes either via your registered e-mail address or, if you have added one, your mobile phone number.
Click “Submit” to confirm your choice. You can change this method at any time in your profile settings.
Step 17
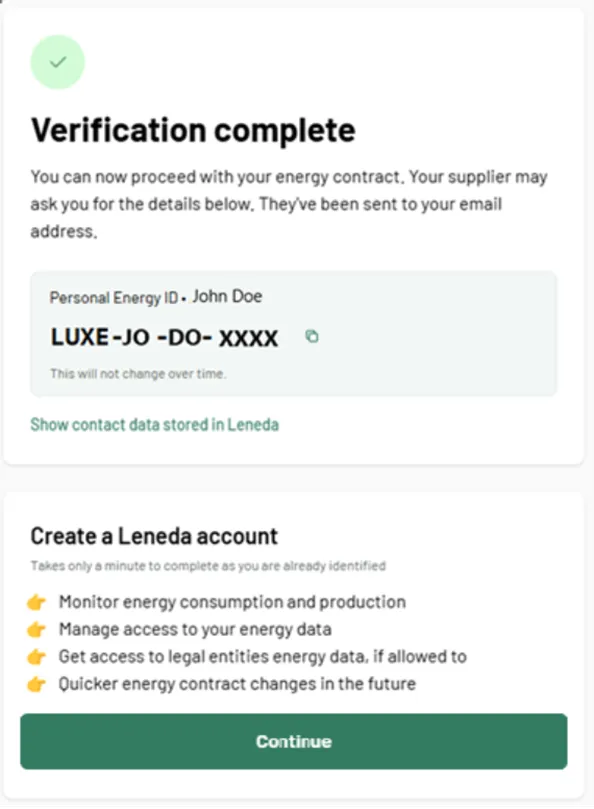
Congratulations, you successfully completed the onboarding process in Leneda.
On your screen, you will see your Energy ID, which is created by Leneda uniquely for you.
You will need this ID when you communicate with your supplier or with your DSO. Now click on “Continue”.
Step 18
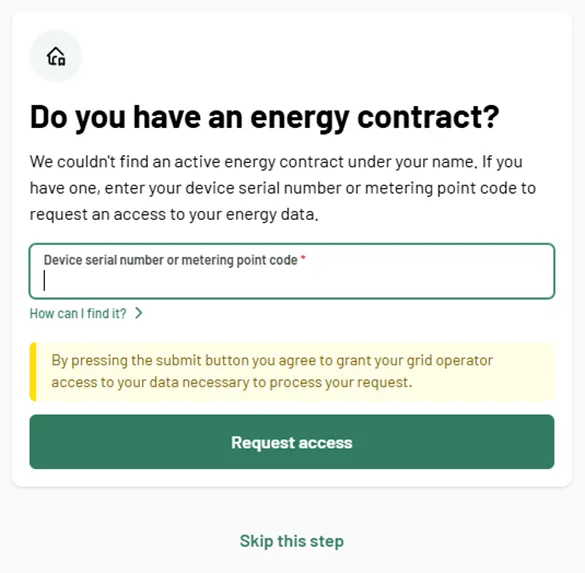
If no automatic match with an already existing customer could be made, you will see this window with the option to enter your Metering Point code, or the device serial number.
You can find your Metering Point code (POD) on your electric or gas bill.
The device serial number is written on your electric meter, gas meter, or also on the bill.
After entering the number, click on “Request access” or choose to “Skip this step”.
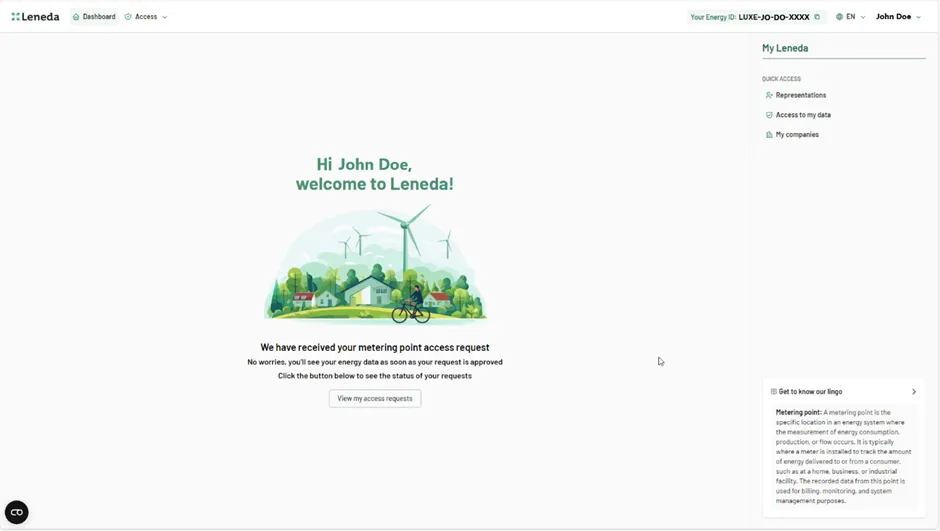
Step 19
Welcome to Leneda.
You arrive now on your Leneda Dashboard and finished your onboarding.